I was working on a fun project for a friend of mine. My friend had a Joe Strummer Fender Artist Series Telecaster, but he was unhappy with the pickups. We talked about pickups over a year ago, so I contacted Brian at Porter Pickups and he hooked me up with a Standard Telecaster set. My friend and myself were excited to get them in.
A few nights later he swung by my house to get them installed. I’ve installed humbuckers in various guitars, and swapped out pickups on my Stratocaster, but this would be my first Tele job. I was psyched to work on something different, so this was a great opportunity. When learning something new, I find doing a search first on YouTube to be very handy. I found this great video to keep me out of trouble when taking apart the Tele by SeymourDuncanChannel:
[iframe_loader width=”425″ height=”344″ frameborder=”0″ longdesc=”” marginheight=”0″ marginwidth=”0″ name=” click_words=”” click_url=”” scrolling=”auto” src=”http://www.youtube.com/embed/zsUnv5aT2lI”]
What I liked about the video, was the experience this guy showed. When you do things more often, you usually tend to learn to do it faster and better and avoid common mistakes that would make you back track or slow down. His first point was using a set of digital calipers. I love my calipers, and if you don’t own one, you should really think about it. Totally removes the guess work.. in just about everything. I love my calipers! To remove the bridge plate, you need to push the saddles forward so the screws can be removed. By measuring and writing down the values of the saddles, it’ll get you back in the game as far as intonation goes when you put bridge back. Again, smarter vs. harder. I love it. He also talks about using something to cover your work area on the guitar so you don’t mare the guitar when unscrewing/screwing screws. Definitely important to not cause damage when you’re trying to actually fix something.
The telecaster swap out was easy, but it is definitely more involved than a Stratocaster. There are more pieces to remove and is more difficult getting the wires routed, but overall, it was easy. The first step for me was to replace the neck pickup. I took note of what lug the signal lead was connected to the switch and where the ground needed to be connected. After completing that, I went to the bridge. The original bridge had a two connections for ground. One to the bridge plate and that hopped to the main ground connection, so I connected the ground of the pickup to the bridge plate connection.
Once everything was soldered, I tested. I think it’s pretty critical to test before everything is locked down! Pretty obvious right? After getting the pickguard re-secured. I tested again. After adjusting pickup heights and securing the bridge plate, I tested again. I wanted to make sure that I did not break a connection during the reassembly, and if I did, I would probably have an idea as to what caused it.
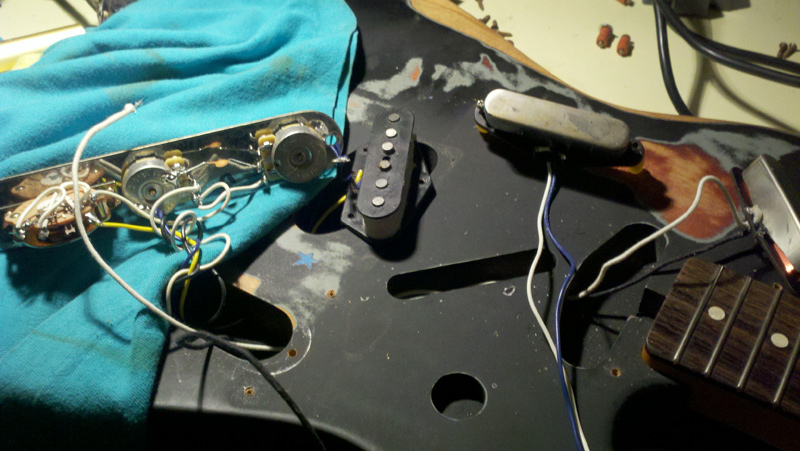
Below is a photo of the Telecaster with the pickguard, bridge plate and pickups removed.
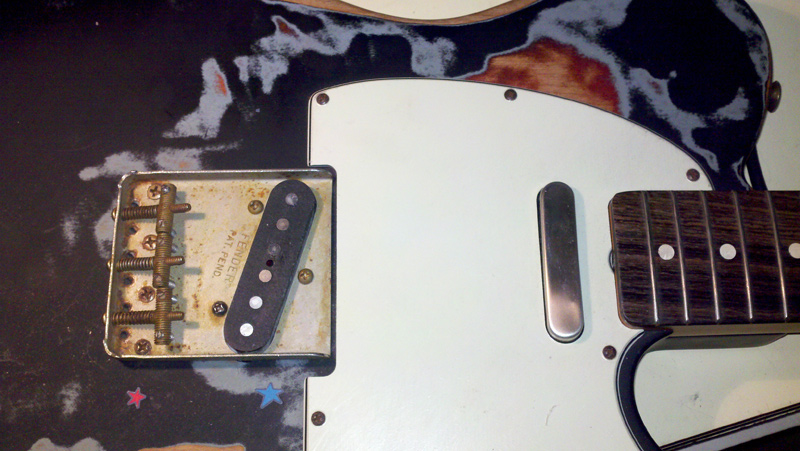
Here is a photo of the completed pickup swap out with new Porter Pickups
So we plugged this guy into my amp, and pickups sound AWESOME. If you’re looking for swapping out your pickups, I would highly recommend contacting Porter Pickups. Hot damn.


Leave a Reply