Pedalboard Photo Contest!

1 1,009 More

Rattlesnake Cable Company / Heather Brown Electronicals Combined Give Away

654 More

Guest Post – Revisiting the Boss GT-8 and Line 6 POD X3 Live by Dean Hailstone

1,001 More

Pedal Labels are BACK!

2,101 More

Effects Bay

  • About
  • Contact
  • Guest Posting
  • Pedal Deals
  • Pedal Line Friday
Home 2010 February True Bypass Loop Strip

True Bypass Loop Strip

Over the weekend I found myself working on a fun project. I’ve been slowly chipping away on my pedal board and one item I wanted to introduce was a bypass loop strip.  I wanted this for several reasons.

– To isolate my pedals and remove them from the signal chain while not being used
– Create chained effects and activate those effects with one switch
– Create a loop for my delay

Now, I already use a Boss LS-2 for my primary lead loop which consists of Holy Fire Overdrive and Ibanez TS9 Tube Screamer, but I really wanted a loop for my Line 6 DL 4. I’ve been working on a few songs where I want to turn the delay on and off, but I loose my tempo when I do so, with this in a loop I can maintain the tempo I set throughout the song and pull it in or out.

There are lots of loop strips out there, but I wanted to see if I could build one. It was somewhat challenging to understand how the 3PDT switches work in relationship to the signal paths, and there is a lot of soldering involved, but overall, it was a easy project.

For those of you that might be interested, I documented my steps, and I’ll supply my part list for building the 5 loop strip. First though, I have to thank SingleCoil.com for writing a great article on this very subject. I used their diagram for this project and is a great resource to understand how this all works. Please check out their website. I’d also like Matt from Cheese Blocks Effects for taking a look at my project (via email) and offering some suggestions for the next build.

Okay… now to the build. First off, let’s start with a part list. I ordered everything from PedalPartsPlus.com.

1 1411TU Looper Enclosure
1 Switchcraft 1/4″ Stereo Jack #12B (I would probably not order this again and just go with 12 monos)
11 Switchcraft 1/4″ Mono Jack #11
1 DC Power Jack
5 Red LEDs (5mm)
5 5mm LED Bezels
5 Xicon 1/4watt 1* Metal Film Resistors 470 ohms
5 (CLIFF) RoHS 3PDT True Bypass Switches
#24/7 Green Wire
#24/7 Red Wire
#24/7 White Wire
#24/7 Black Wire

Tools you’ll need: wrenches, screwdriver, soldering iron, wire strippers, wire cutters, solder (I used 60/40 rosin-core .032 dia) and needle nosed plyers. It’s incredibly nice to have the ‘3rd set of hands’ alligator clips deal for soldering. Also a nice pair of wire strippers makes things easier.

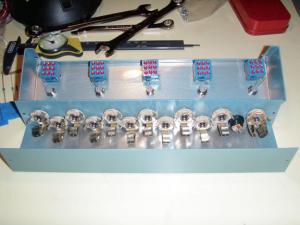
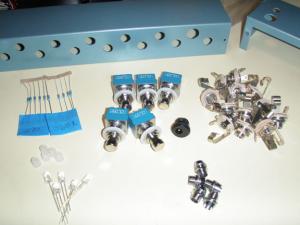
This is what it looks like when I got the package. Note in this photo I have 5 560k resistors. I did not need to use those.

Next, I loosely inserted the jacks and switches. I locked in the LED bezels. I say loosely added them, because you’ll be pulling them out again. I basically put them into position so I could measure the wire lengths needed. I wanted to make sure I could open the enclosure if there was a problem. Also this enclosure is pretty tight for soldering.

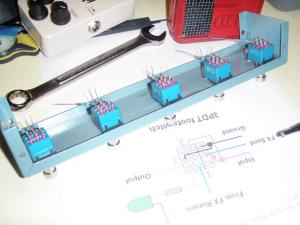
Next, I thought I would work on the switches. In the diagram I was using you needed to make a ground jumper from bottom left to middle right.  I first soldered the resistors for the LEDs and clipped the remaining unused lead tail and used that as the jumper and soldered that in place. I was using this diagram from SingleCoil.com (http://www.singlecoil.com/tb-strip/dia3.html).

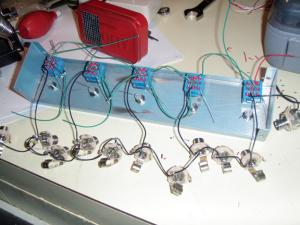
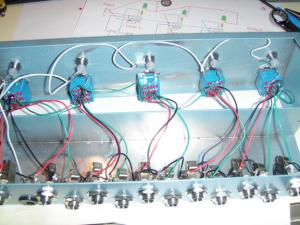
I then started on the ground connections. Linking all the mono jacks and linking the send/receive pairs back to the the switches, as well as linking those to the master input and output of the strip. It’s important to understand the jacks and what lugs are what. Mono jacks only have ‘tip’ and ‘sleeve’.  Stereo jacks have tip, ring and sleeve. The sleeve will be the ground and the tip will be your signal from the guitar. The lug (what you’re soldering to) is opposite of the tip or opposite of the sleeve. For this strip, you should be using all mono jacks since it’ll be DC powered and we don’t need to activate the current with the input jack like most pedals. For this project, I accidentally wired the signal to the sleeve of the stereo jack instead of the tip. Here is a good diagram that I was using illustrating a jack and it’s lugs: http://skyturtle.com/2009/02/17/stereo-phone-jack/

From here, I started to wire the send and returns of the effect loops as well as the DC jack.

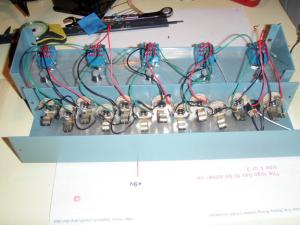
All that is left is to connect the LEDs to the resistors and to chain the positives together. Matt from Cheese Blocks recommended that I should have used heat shrink tubing on those leads, and I definitely thought about it. In the future I’ll definitely add that to help prevent any shorts. For this project I made sure that the leads were bent up towards the lid and away from the switches as best as I could, but that little bit of shorting prevention could go a long way.

One thing that I would recommend is to make sure you clip any excess leads from wires and components, especially at the jack lugs. These jacks are very close together and could be another area of potential short circuits. Make sure you use a hot soldering iron and to focus on clean joints.

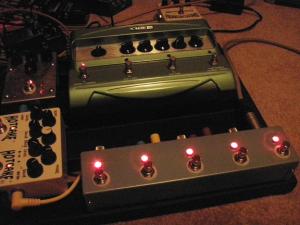
When she was all done (and after I fought the ‘sleeve’ issue with the master input) it was time to test it out. All the loops worked and everything sounded great. Here is shot of it on my board for initial testing:

Hope this comes in handy. I’ll be making another one here shortly, like to add a few more items in there.. master on/off switch, tuner out.. maybe even play with a buffered loop.

Feb 22, 2010admin

Related posts:

Default ThumbnailVisual Sound (buffered bypass) and Route 808 Default ThumbnailBoss TU-2 Tuner – Must Have Default ThumbnailDefining True Bypass and Buffered Bypass Default ThumbnailCool Line 6 DL 4 delay video
Pedal Give-Away Contest :: Mellowtone Trumpet Fuzz Effect PedalIt Might Get Loud on DVD
Comments: 4
  1. Matt
    15 years ago

    Have you used it enough to know if it “pops” when you engage the switch/channel/loop? I am looking at the Mars Manipulator as a possible looper and i was wondering if a normal one like this would be better. ~Matt

    ReplyCancel
  2. admin
    15 years ago

    Hello Matt

    Thanks for the comment. I have not used it enough to really determine any issues like popping. The other night I did notice a ‘pop’, but my amp is high gain.. and loud. I left the loop open and disengaged the pedal that was in line (Audio Crowther Double Hot Cake) and it make the same pop while the loop was open. I ran out of time, but tomorrow, I’ll do some A/B testing with the loop and without the loop to compare noise. Like I said, I play loud and that level of pop would totally NOT be heard. I did the initial test with volume on the guitar rolled 100% off and clicking the switch and or pedal.

    Thanks!
    h

    ReplyCancel
  3. Paul
    14 years ago

    True by pass largely unknown to most players can build a charge that will pop. Pretty common and also complicated by those who try to daisy chain power feeds, a recipe for ground loop hum and noise floor.

    Not sure what this cost, probably less than the Voodoo Vibe 4 loop switcher or the really cool and programable Carl Martin 8 loop octave switcher. Really not a ton of bucks but each are sealed jack, buffered or by pass and silent switches, no clicking either. The Carl Martin is a real winner, load up 8 loops of single or multiple pedals. Select which ones to turn on for each of the 8 switches, pretty awesome isolator. Your tone will be emmensely improved when you get those non true bypass not so good buffer pedals out of the chain.

    ReplyCancel
  4. David
    11 years ago

    I love the Road Rage Looper Kit that I got, great parts and super easy to put together! Worth checking them out as well!

    ReplyCancel

Leave a Reply

This site uses Akismet to reduce spam. Learn how your comment data is processed.

admin
15 years ago 4 Comments Mods, Repairs & Buildingloop, loop strip, project, true bypass3,841
Sponsors
Advertise on EffectsBay.com!
Amazon Associates Disclosure

EffectsBay.com is a participant in the Amazon Services LLC Associates Program, an affiliate advertising program designed to provide a means for sites to earn advertising fees by advertising and linking to amazon.com. Please view Affiliations below for additional information about links.

Pages
  • About
  • Contact
  • Guest Posting
  • Pedal Deals
  • Pedal Line Friday
  • Privacy Policy
Recent Posts
  • Pedalboard Photo Contest!
  • Rattlesnake Cable Company / Heather Brown Electronicals Combined Give Away
  • Guest Post – Revisiting the Boss GT-8 and Line 6 POD X3 Live by Dean Hailstone
  • Pedal Labels are BACK!
  • Pedal Line Friday – 2/12 – Joe Perkins
Archives
DIY / MIY
  • Beavis Audio
  • Build Your Own Clone
  • Cubist Effects
  • DIY Stompboxes
  • Effects Connection
  • General Guitar Gadgets
  • Guitar PCB
  • Mad Bean Pedals
  • Mod Kits DIY
  • Officially Licensed Circuits
  • Pedal Enclosures
  • Pedal Parts Plus
  • Small Bear Electronics
  • Stomp That Box
  • Tone Clone Pedals
Guest Posters
  • Andrew Elmore
  • Bobby Morelli – Drew Street Mary
  • Brian Porter – Porter Pickups
  • Christian Moraga
  • Danny Dyson
  • George DesRoches – The Random Band
  • Giovanni Lanese – Glitterball Band
  • I Hate Barre Chords
  • Kevin Ian Common – The Common Men
  • Lee Chavez
  • Mark Grundhoefer
  • Matthew Cheezem
  • Nick Georgiou
  • Norman Harris
  • Worship Rocker (Donny)
Sites
  • 22 frets
  • Dy-sphoric
  • Guitar Jar
  • Guitar4Free
  • I Heart Guitar
  • Louder Than Quiet
  • LP Stop (Les Pauls)
  • Never Too Late Guitar
  • Pedal Nerd
  • Stomp That Box
  • VintageandRare.com
  • What's That Dude Play?
Affiliations

Effectsbay.com is affiliated with the following business:
Musician’s Friend
Guitar Center
Amazon
Google
Rattlesnake Cable Co.
Pedal Labels

This means that some links will go to their website and EffectsBay.com can potentially receive a commission for items purchased there. Or in the case of Rattlesnake Cable Company and Pedal Labels, they are owned by the owner of Effects Bay.

We will also disclose if reviewed products were kept when sent by the manufacturer to us for review.

Search
Contact

Hank c/o EffectsBay
P.O. Box 2364
Missoula, MT
59806

Privacy Policy

Advertisement
Interested in advertising on the site or submitting products for review and/or giveaways? Send me a message!
Newsletter

2017 © Effects Bay